4 min read
Tutorial : Build your RAG in minutes with OpenSearch® and Scalingo
Creating a Retrieval-Augmented Generation (RAG) system used to require piecing together several complex tools. Thanks to OpenSearch® and Scalingo, the process is now much more streamlined.

In the past, building a RAG (Retrieval-Augmented Generation) meant juggling many different tools. Today, the process is much simpler: you just need tools like HuggingFace to get your model and OpenSearch® as a vector database. In this tutorial, we’ll walk you through the entire process step by step, and show you how to build your own RAG using Scalingo and our OpenSearch® offering.
📼 If you’d rather watch than read, here’s the video version of this tutorial.
Getting started
The first step is to create an account on Scalingo or log in to your existing one.
Keep in mind that the 30-day free trial offered at sign-up does not include the integration, use, or activation of OpenSearch®. If you want to follow this tutorial right away, you’ll need to end your trial in your settings.
Alternatively, you can use your free trial period to explore other features of the platform, and then come back to this tutorial once you’re ready to get started with OpenSearch®.
💡 More info on our free trial and what is included.
Once your account is set up, choose one of the OpenSearch-provided pretrained models. In our example, we’ll be using huggingface/sentence-transformers/all-MiniLM-L6-v2.
Creating Your App on Scalingo
Now, head back to your Scalingo dashboard. We’re going to create an application on the platform, to set up the OpenSearch® Dashboard.
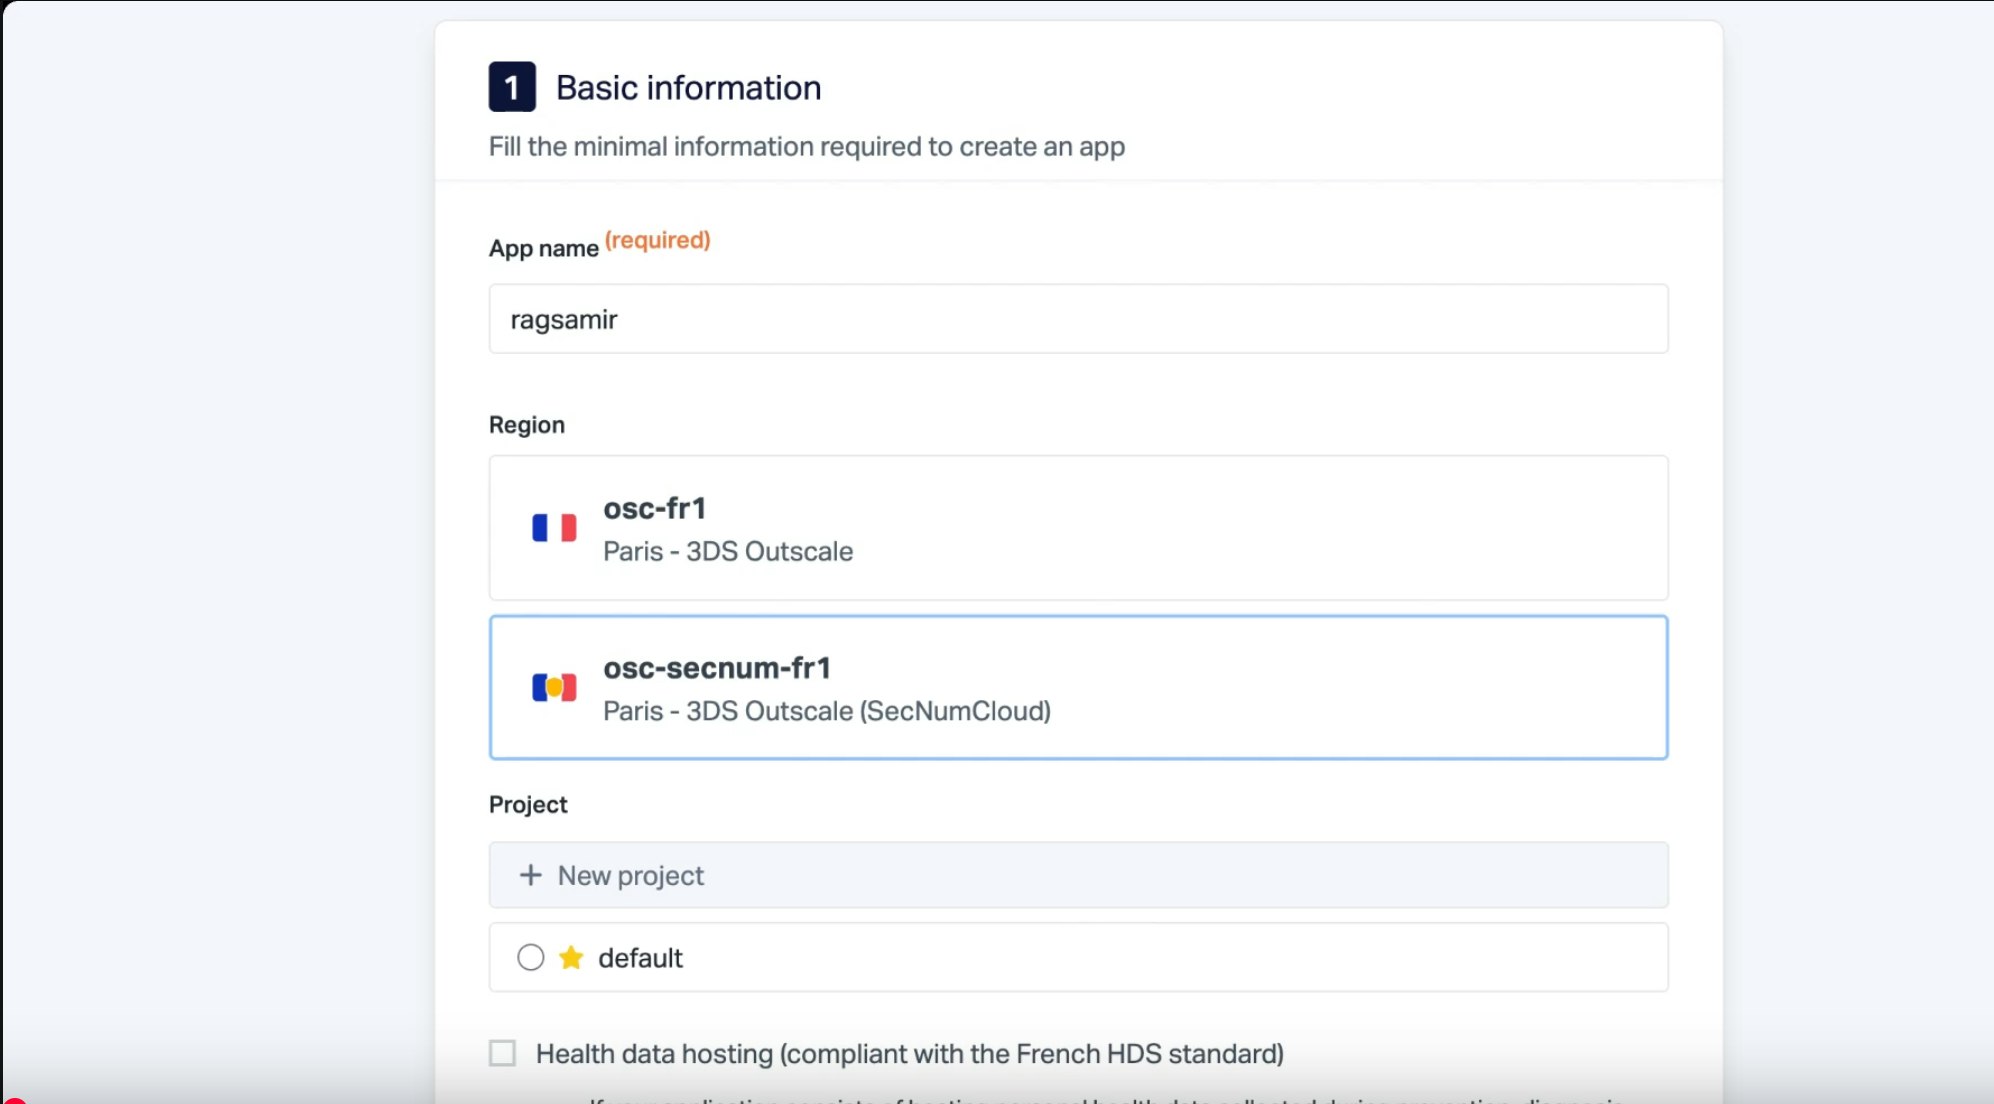
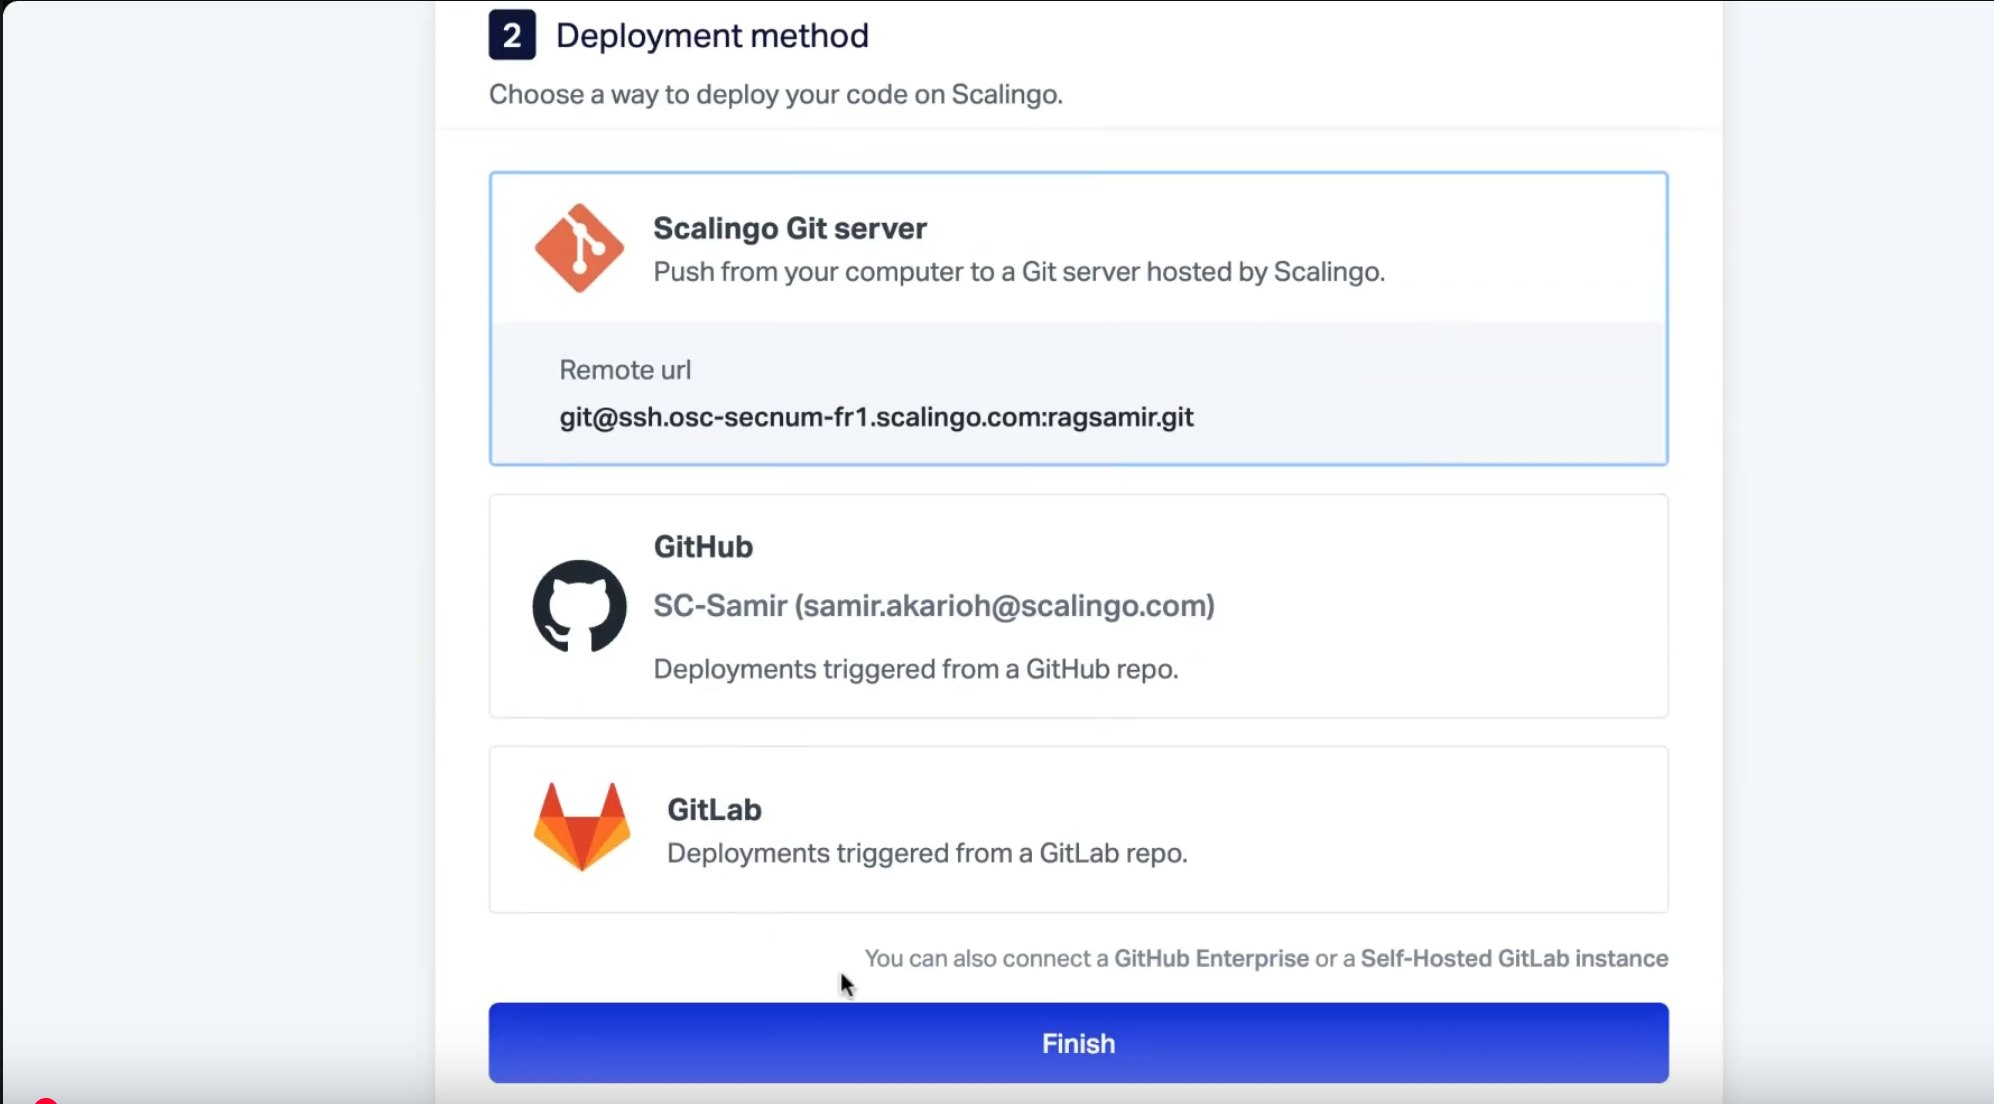
Choose the Git deployment option, selecting the HDS (Health Data Hosting) or our SecNumCloud offering (based on our partner Outscale's qualified IaaS) if your app uses sensitive data. Else, leave the default option.
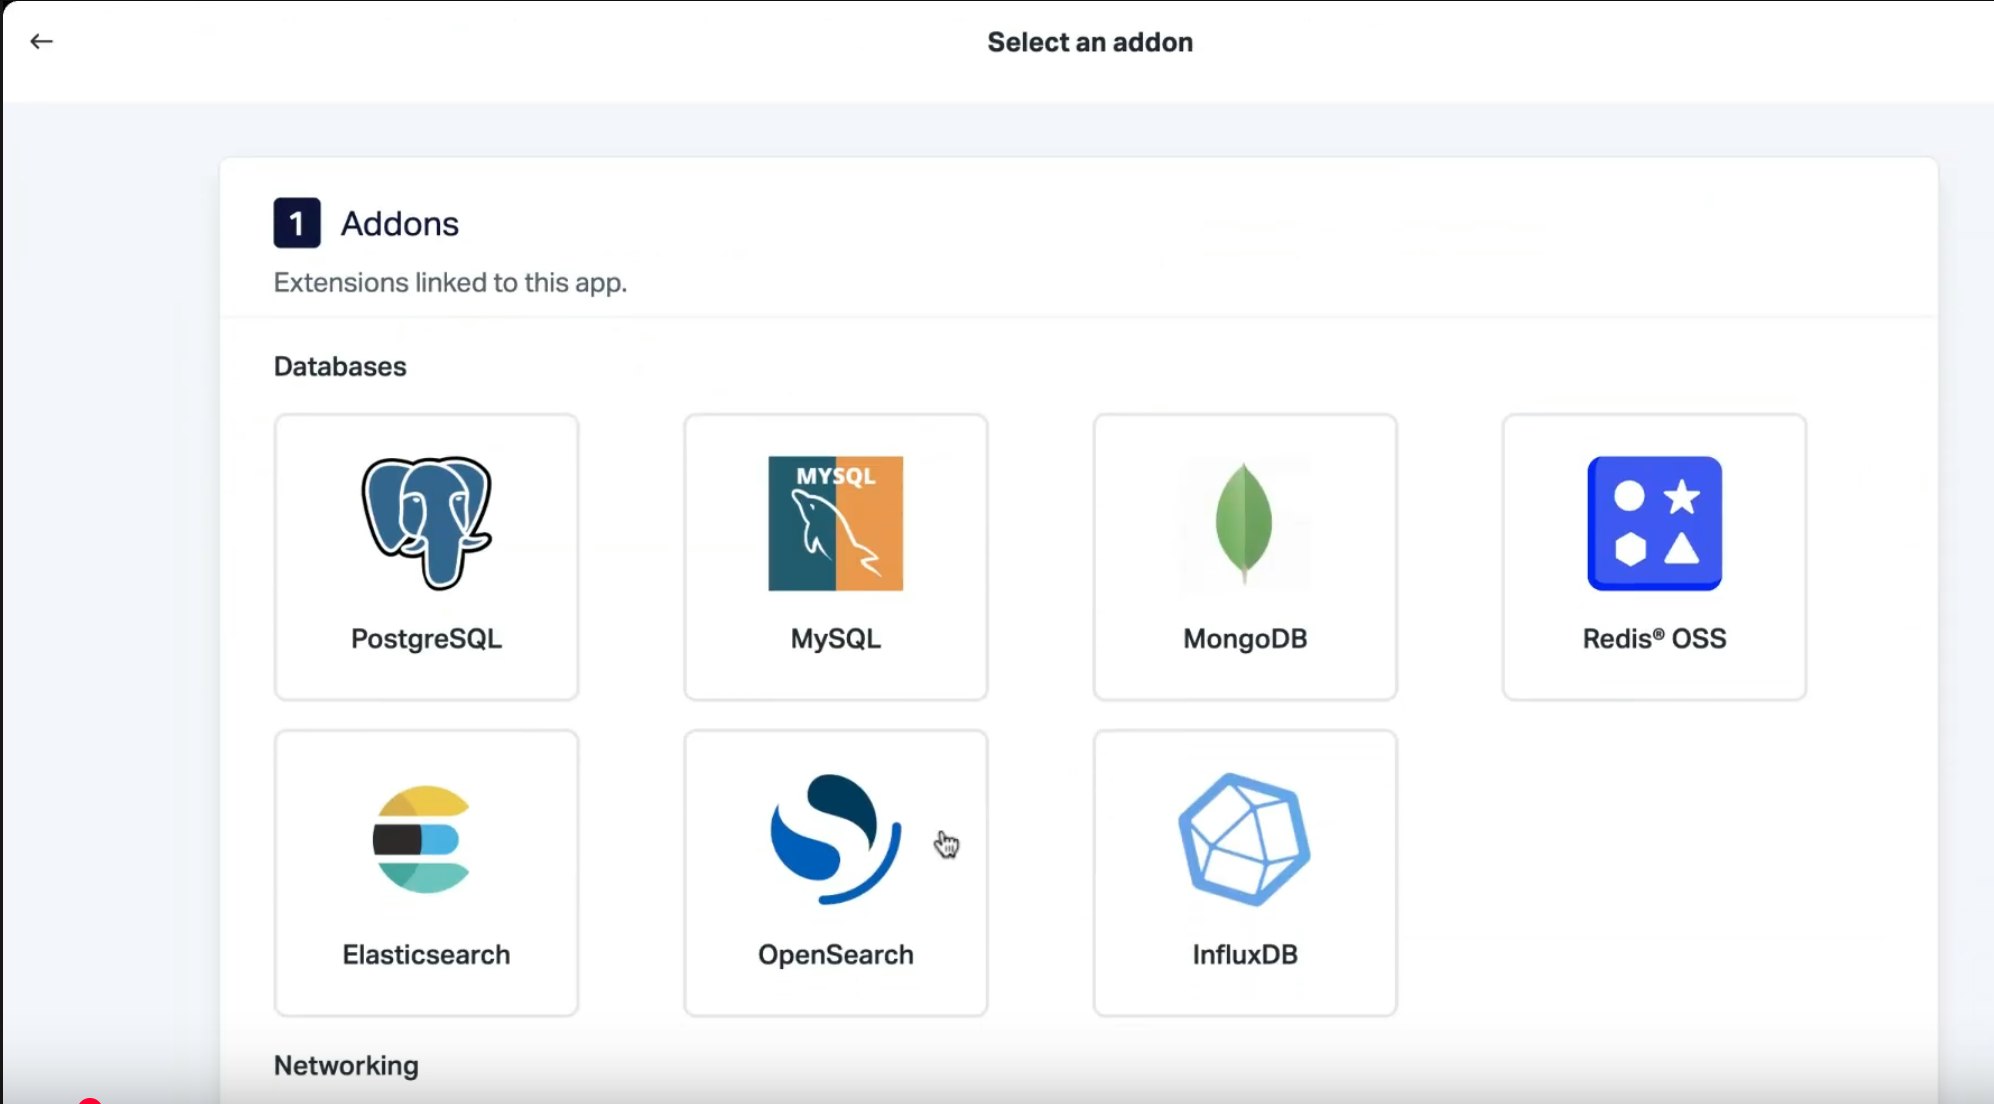
Back in the Scalingo dashboard, it’s time to add an OpenSearch® database to our application. To do this, click on your application, and in the “addons” section, click on “manage”. Next, click on “add an addon” and select OpenSearch®.
Scalingo offers several database plans, depending on your needs. But, for this app, we recommend choosing the Business plan so you can take advantage of high availability and multi-node setups.
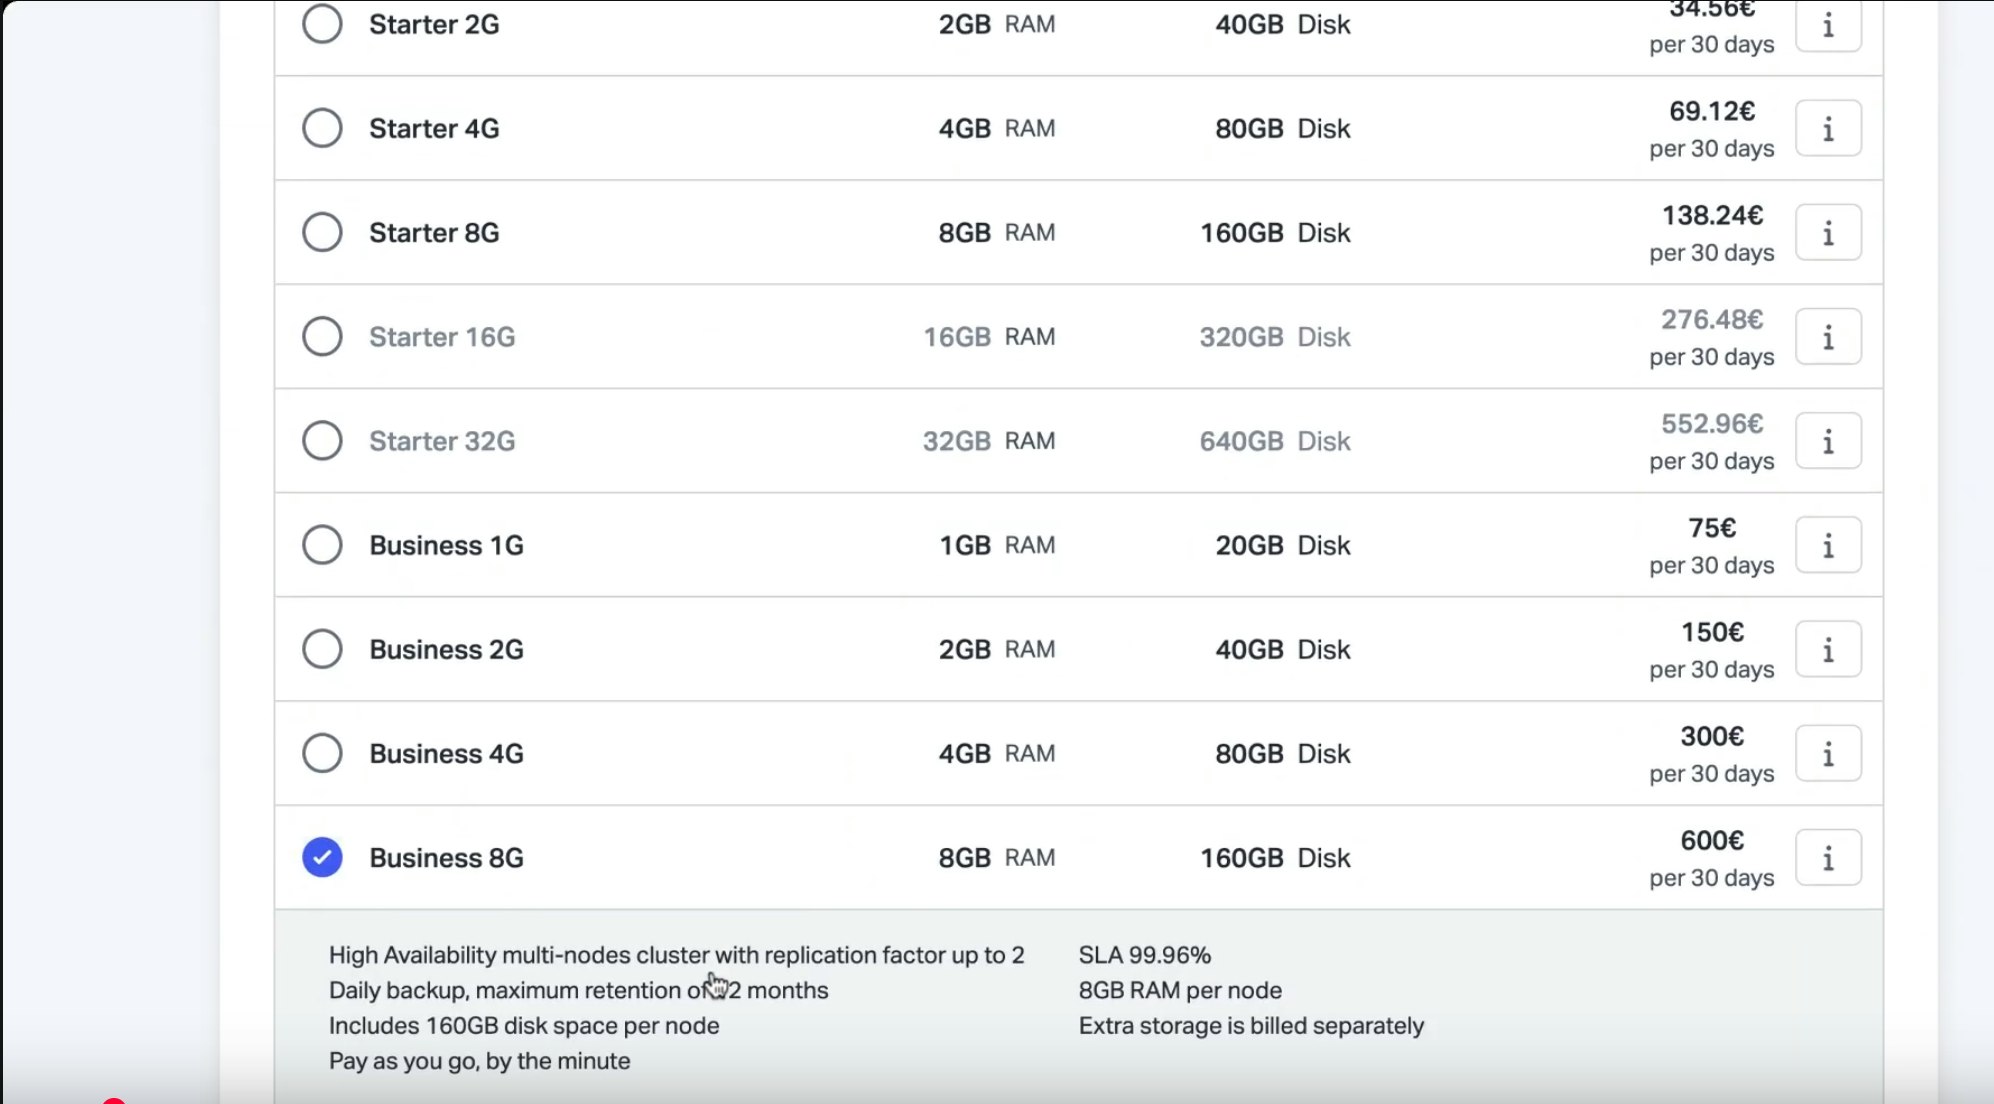
💡 Need help choosing the right plan? Visit the comparison page or reach out to our team.
Now it's time to install the OpenSearch® dashboard. To do this, go to the Environment Variables section of your OpenSearch® Dashboard app and add the following environment variable:
Installing the OpenSearch® dashboard will make it easier to track each stage of the process and give you access to the Dev Tools.
In your code editor, clone our repository for OpenSearch® Dashboard:
Navigate into the folder (cd) and add the remote connection with: git remote add scalingo <your_opensearch_dashboard_app_url> Replace with the remote URL of your OpenSearch® Dashboard application on Scalingo.
Finally, push your commit to Scalingo.
Setting Up the Model and Vectors
Now it’s time to deploy and register the model in OpenSearch®. Registering the model tells OpenSearch® how to connect to your custom model server.
To do this, your model must be in the ONNX format. You can find more details on how to configure your model on its page on Hugging Face.
Go back to Scalingo and select the application that contains your OpenSearch® Dashboard. Open it and make sure the OpenSearch® dashboard page loads correctly. Log in using your user credentials, which can be found in the environment variable SCALINGO_OPENSEARCH_URL on your application dashboard, then navigate to Dev Tools.
Next add the following parameters:
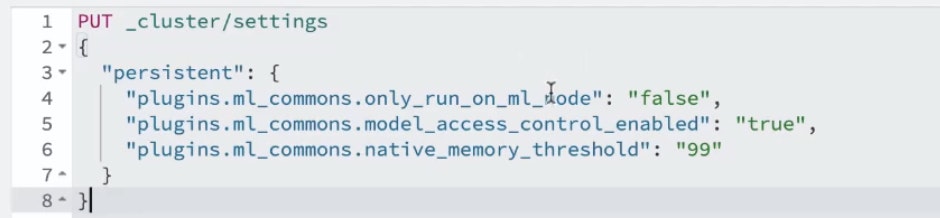
The first setting allows OpenSearch® to download the model online
The second allows the model to be launched on all OpenSearch® nodes
The last two remove memory limits and enable access control.
These parameters are crucial to ensure your model is correctly loaded and optimised across your entire cluster.
This is also where you’ll be able to register your model group, by entering this request in the DevTools. You can choose the name you’d like for your group, but make sure to keep the ID obtained after sending your request. Follow the steps 4 and 5 of this page to complete the registration of your model and its deployment. All the information about the model you chose, like its name and version, are available on the OpenSearch® website. After these steps, keep your model ID handy.
Now, you’ll need a way to convert your documents into embeddings. To do this, create an ingestion pipeline by following the process described here. Make sure to put the ID obtained in the previous step in the model_id field .
Next, you’ll need to create a vector index. A vector index is a structure that allows you to store and efficiently retrieve vectors. Enter the request indicated on the OpenSearch® website and make sure to modify the “default_pipeline” field so that it matches the name you gave to your pipeline created in the previous step.
Note: Make sure that the dimension in your mapping matches the output dimension of your model.
Finally, we’ll add documents to our index. To do this, ingest the documents you chose with the following request:
Perform the operation as many times as necessary, changing the number at the end of the endpoint, as shown in this example.
You can also add several documents at the same time, with the /_bulk endpoint, as you can see in this example. Make sure to edit the index so it matches yours.
After this step, you can set up your research pipeline and send in a request to make sure everything is working. The request can be found here. Don’t forget to edit the request to include your own model ID.
Conclusion
You now have everything you need to build your own RAG with OpenSearch® and Scalingo: automatic embedding generation and an ingestion pipeline. From here, simply add documents to your OpenSearch® index, and you’ll be able to run queries directly from the OpenSearch® dashboard.
Need more guidance on using OpenSearch® with Scalingo? Reach out to our friendly team!

Samir Akarioh
Samir is DevRel at Scalingo, a role that combines marketing and tech, two subjects he is passionate about. His goal? To share his knowledge with developers and Scalingo users.
Stay Updated
Get articles and platform updates in your inbox.
Ready to Deploy with Confidence?
Experience zero-downtime deployments, intelligent auto-scaling, and fully managed infrastructure. Start deploying your applications on Scalingo today.
No credit card required • Deploy in minutes • Cancel anytime